The staRT of our story:
The red and green RTs operated in all areas of London from their debut in 1939 right up until their final working day at Barking on Saturday 7th April 1979.
They were one of the largest standardised fleets in the world and we had both known them since childhood. We were very sad to see them being replaced at all garages by more modern vehicles which lacked the perfect shape and style of these much older buses.
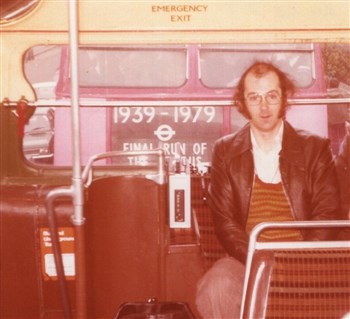
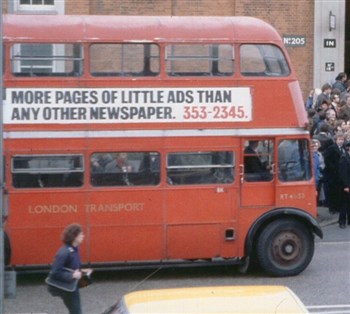
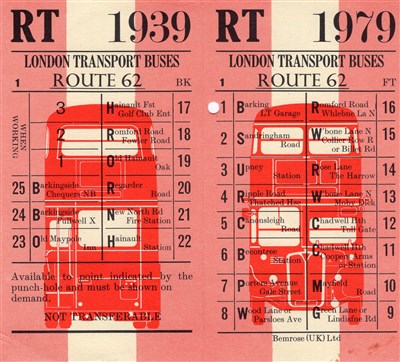
We travelled on two different RTs in the final day's commemorative parade along route 62 to witness the end of these superb vehicles. At that time we thought that this would be the last regular contact that we would have with RT buses - little did we know!
Photos below show Malcolm in the rear upstairs seat of RT2541 whilst Dave is alongside RT4633 after alighting at the end of the run back to Barking Garage.

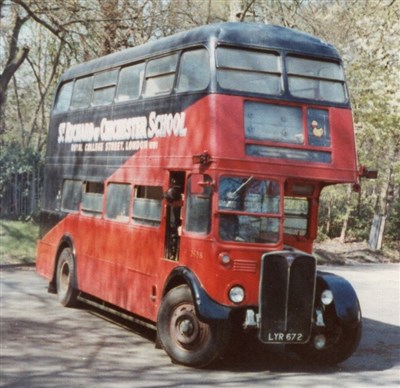
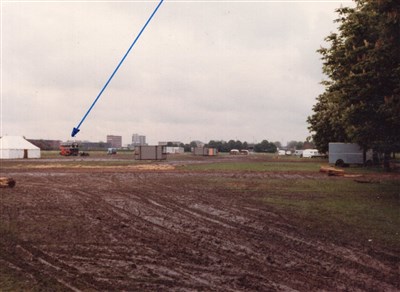
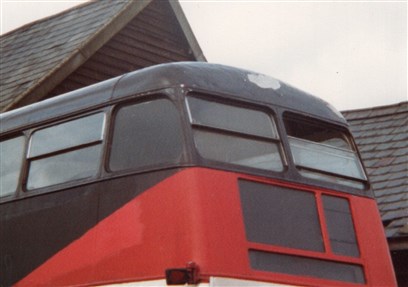
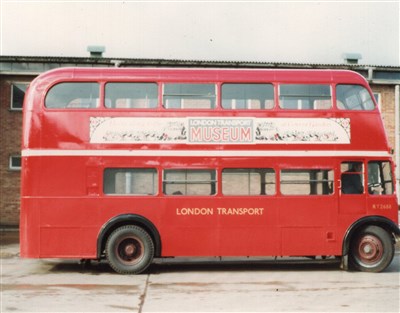
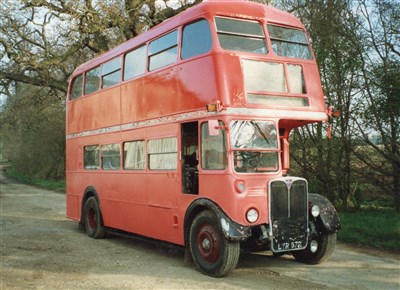
Later that year, and in the following two years, we attended a few bus rallies and shows including the open day at Cobham Bus Museum by car, as well as occasional trips on preserved buses to special events. In 1981, neither of us attended the Cobham open day, but a friend of ours did, and he spotted a red and black RT lurking in the depths of the museum with a “for sale” sign in the side window:
Once alerted to this information, we decided that we should arrange for a viewing and a road-run which we did one April afternoon shortly after. Without giving too much thought about where to keep a vehicle that was 14’ 6” tall and 26 foot long, we agreed to buy it almost immediately!
We managed to arrange some open-air storage at a farm in Hertfordshire at very short notice and collected it from the museum on 2nd May 1981, the 5th anniversary of its withdrawal from London Transport service.
1981
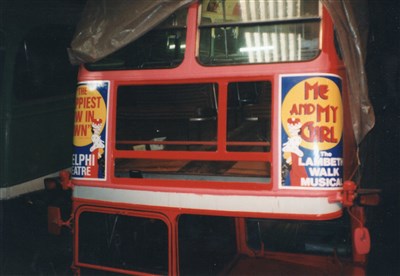
The first thing that we did, just one week later at the farm, was to paint out the name of the school with matt black and poppy red paint to hide its former ownership.
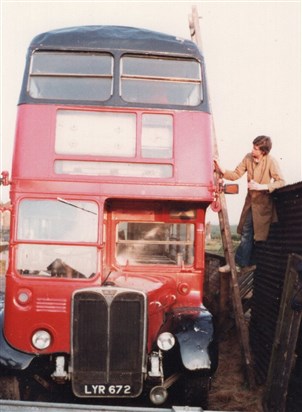
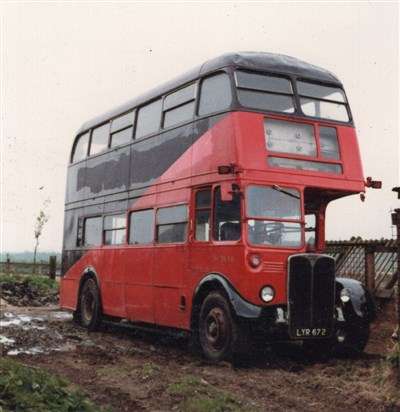
Then, a few weeks on, at the Enfield Pageant of Motoring rally, we applied a white painted waistband to make the bus look a bit more “normal” again.
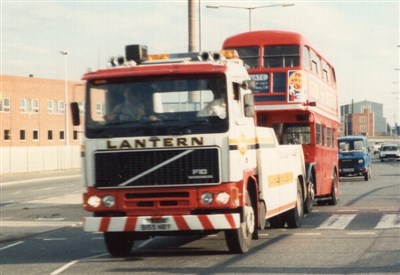
Unfortunately, it was parked on grass for three whole days during which time it rained almost continuously. By late Monday afternoon, the field was a mud-bath and although we were close to a concrete path, we had to drive forwards and in a long curve because of the trees behind us. After a few frustrating hours, the bus was stuck in the middle of the rally field after repeated failed attempts by some heavy trucks to tow us free.
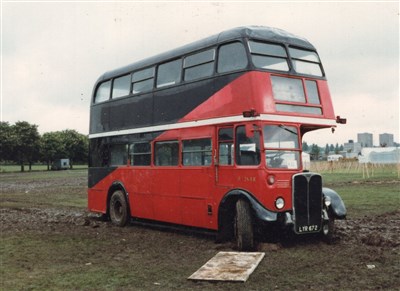
We had to request the services of Lantern Recovery Ltd who brought an 18-ton winch truck to site on the Tuesday morning. This stayed firmly on the concrete path and dragged the RT slowly backwards across the mud with a thick steel wire on a winch. After that, we were a lot more choosy about the type of surfaces we would park on at events and rallies!
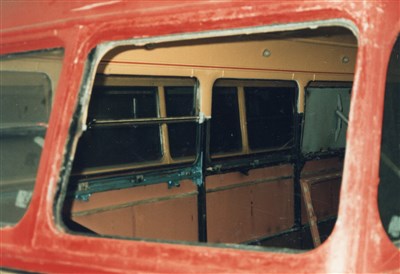
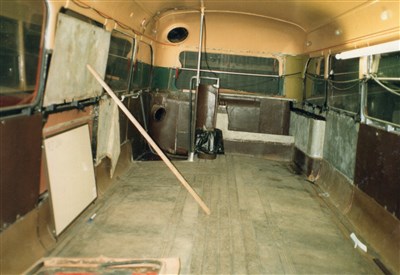
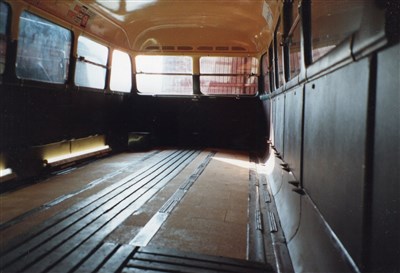
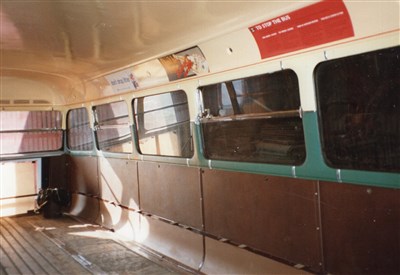
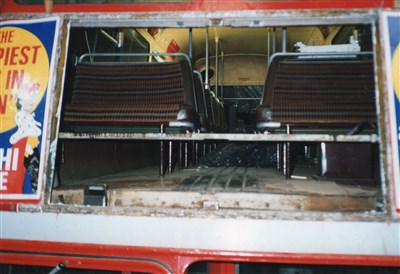
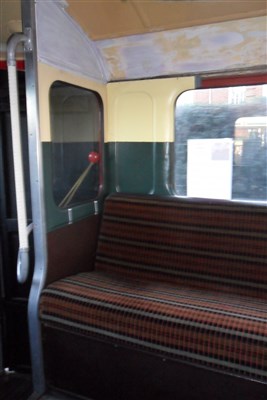
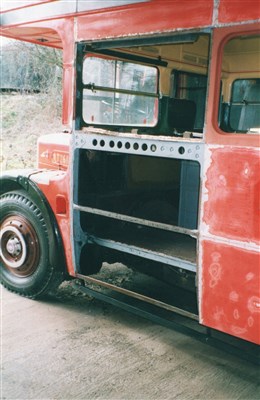
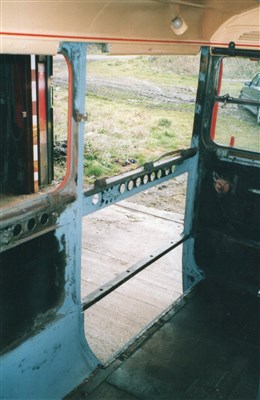
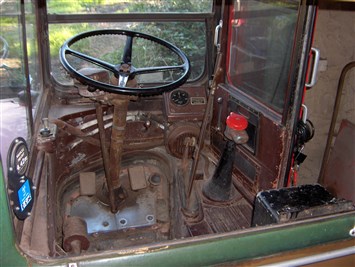
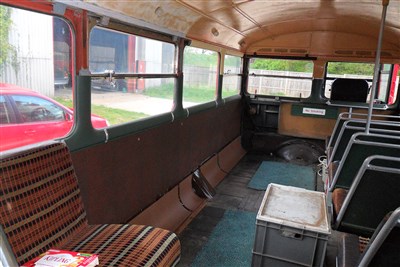
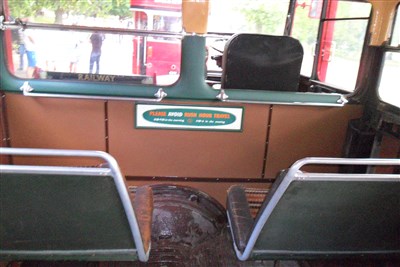
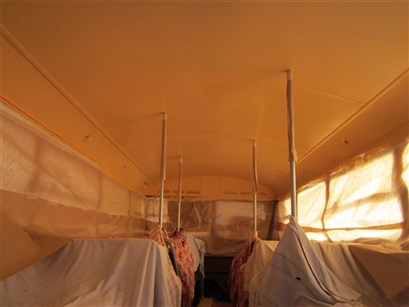
The interior had been altered so that the seats faced each other in pairs and a sink unit and cupboards were fitted downstairs. Upstairs, there were more tables and seating plus two wooden screens towards the front with a bedding area on each side built onto cut down seat frames. We began to remove all of the surplus bits and realised that we were short of a quite a few seat cushions and a number of complete seat frames.
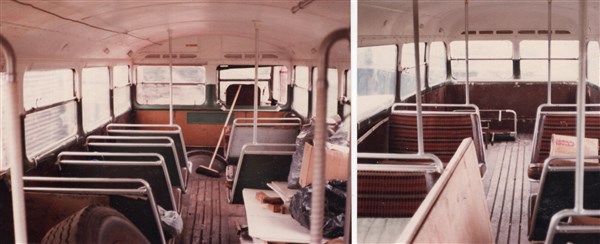
A few months later, in August, we made a long trip through the night, leaving at around 11pm on a journey to the bus scrap yard at Barnsley in Yorkshire. We arrived about 5.30am and when the yard opened, spent the day removing as many parts as possible from the multitude of scrapped RTs there. We got sufficient seat frames and cushions and plenty of of other bits that were easily removable and which we thought might be useful. They would not let us dump the cut down seat frames, so we rattled back to Hertfordshire with even more loose metal parts than before!
We started re-converting the bus back to a full seating arrangement and a few weeks later we finally managed to get rid of all the surplus metalwork.
1982
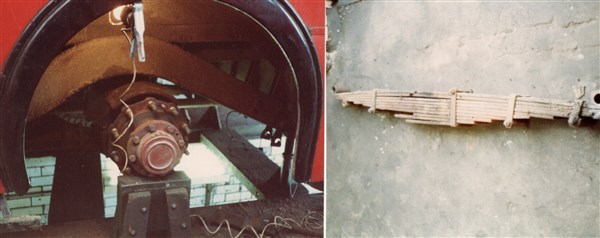
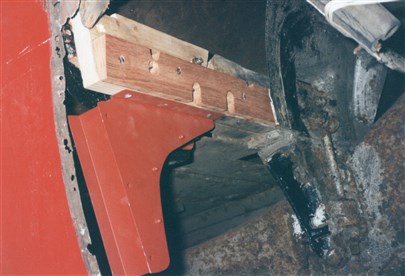
In January, we had to replace the rear spring above the nearside rear wheels as two of the leaves were cracked. Fortunately, we were able to get some assistance with this job at a nearby bus garage which made the task much easier. At nearly five feet long and in quite poor condition, a third leaf broke as it was removed.
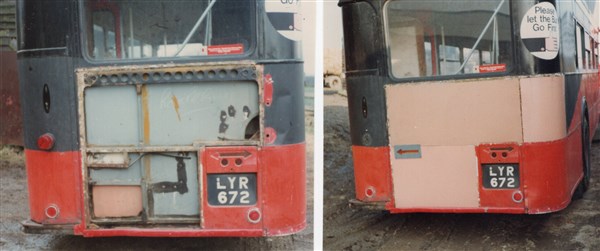
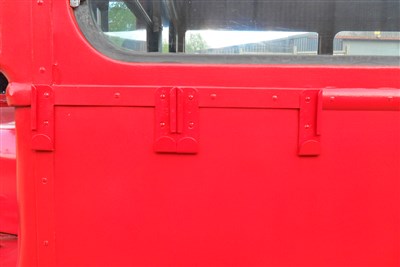
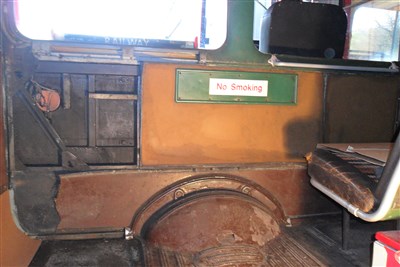
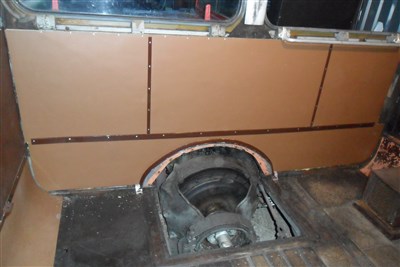
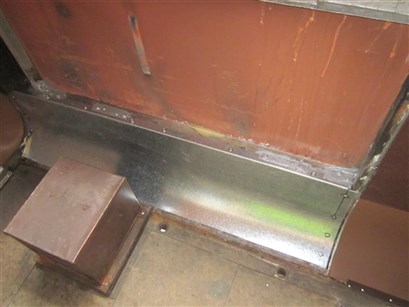
Around the same time, the spare wheel and bracket were removed from the rear of the bus and the lower rear panels were replaced with new ones.
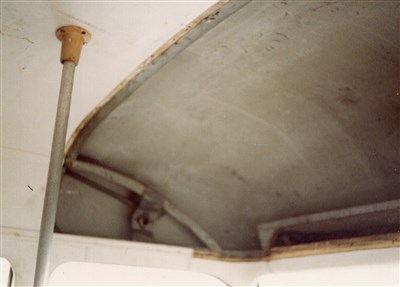
Next, we got a panel beater to remove the dents from both the front and rear roof domes which entailed removing of both inner ceiling linings.
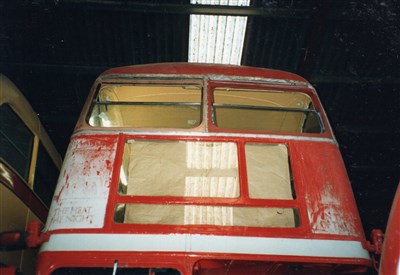
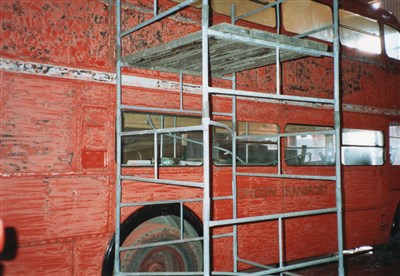
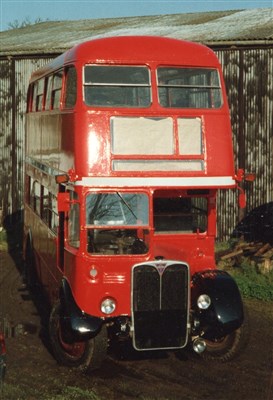
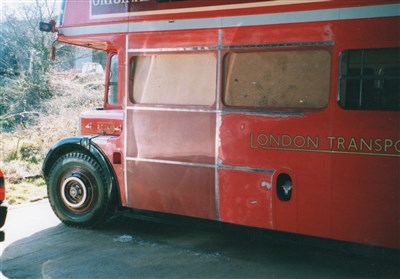
We spent a day in February sanding the old red and black paintwork, followed shortly afterwards by a full external repaint during one weekend in March.
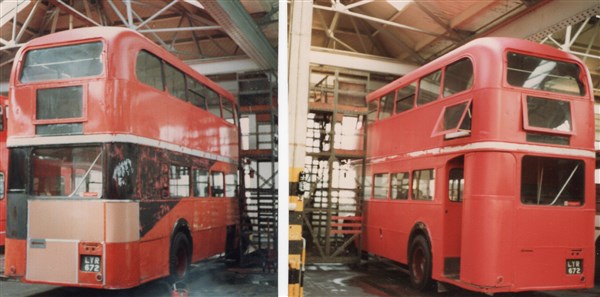
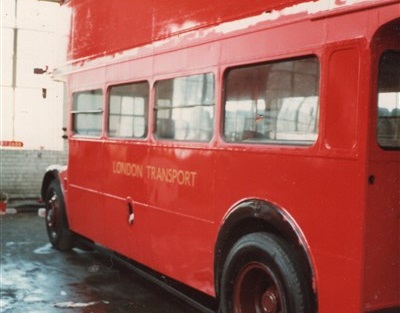
We were very pleased to see the bus in a more appropriate red livery with flake grey band just as it would have looked following its final overhaul back in 1968. Our only concession to modern driving conditions was the fitting of a slightly larger driver's mirror on the nearside which was obtained from a DMS bus.
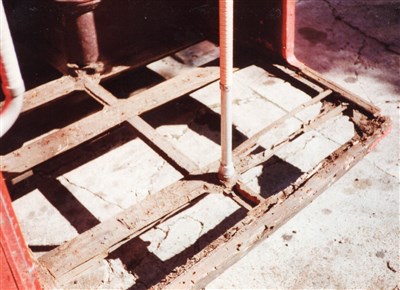
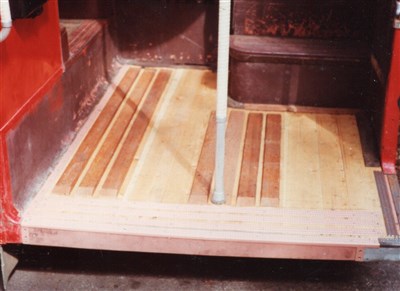
In August, we stripped the platform structure ready for this to be rebuilt at Cobham. We completed the fitting and varnishing of the slatted floor boards shortly afterwards.
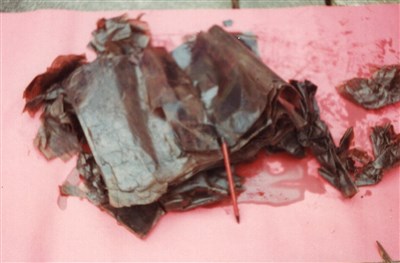
We then had problems with fuel starvation which were traced to a large quantity of paper and pencils which had been pushed down the diesel inlet pipe and were trapped inside the tank. The tank was removed and cleaned out before being re-fitted.
1983
This was the year in which we had, (or so we thought at the time), a really great idea! A single decker bus, RF351, was offered for sale and we decided that if we bought it, then we could use it for trips and to attend rallies. This would allow us to do some more major work on the RT which could be taken off of the road for a period of time. The reality was somewhat different, in that we used the RF so much that there was no time left to work on the RT and it was hardly touched for two years!!!
1984-1985
In December of 1985, the RT was relocated to some under-cover storage which was much better for the ageing bodywork and for its security in general.
1986
In April, we made the reluctant but sensible decision to sell the RF, enabling us to return to the long promised restoration work that was needed on the RT.
1987-1988
Next, we started on a full refurbishment of the upper deck saloon which took us over two years to complete. We made regular weekly visits generally on a Sunday morning, and with all three of us working, David, Paula and Malcolm, spent a massive amount of time on the project.
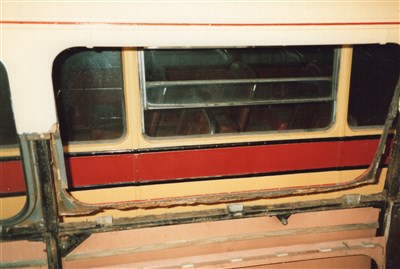
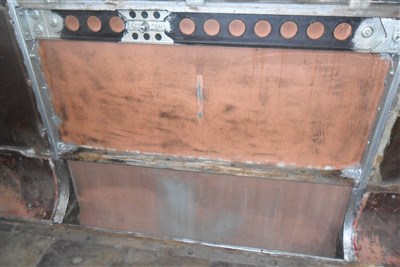
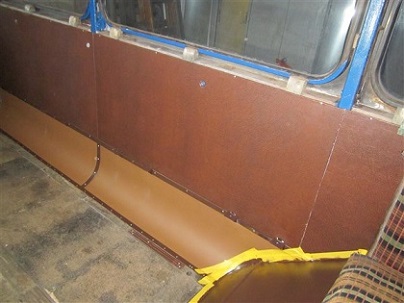
Firstly, we took all of the seats and frames out, then started to remove all of the brown side panels and most of the green covered mouldings. This was a time consuming job as most of the slotted screws had rusted and were very difficult to undo. New 1/8” thick plywood panels were cut to size and together with all of the other pieces that had been brought away, were treated to a covering of new rexine in the appropriate colours.
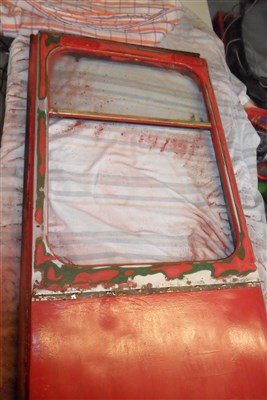
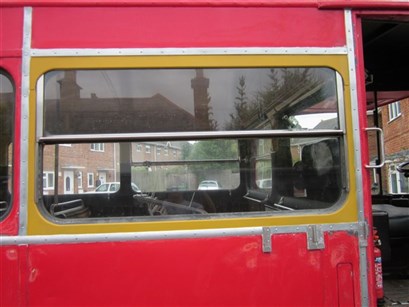
Many of the upper deck window frames needed complete replacement which was also quite difficult as they are held in place by screws on the outside that are hidden beneath the external beading. The non-opening ones were in better condition and were all repaired in situ.
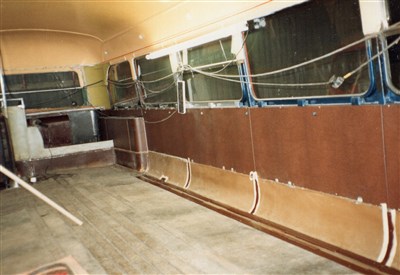
After the timber and metal structure had been cleaned, repaired and repainted we put all of the refurbished parts back into position. We also replaced the rear upper deck emergency exit door with a better one from a scrapped bus.
Once we had all the side panels back in position, we masked the whole area with brown paper and repainted the ceiling in the correct shade of cream.
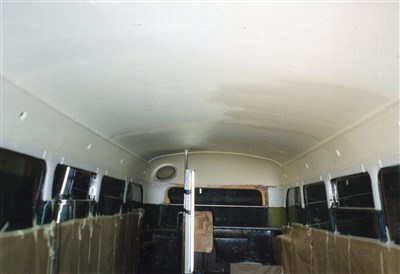
The upper deck floor was cleaned and the timber areas were wire brushed and varnished. We refitted the brown painted metal strips and put new lino tiles on the floor.
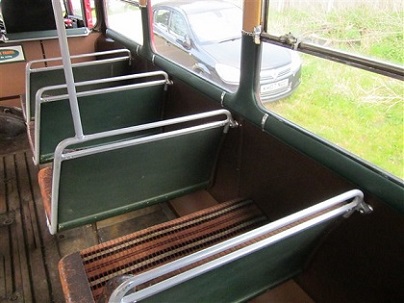
The seat frames were given a quick rub down and a coat of brown paint before being fitted into place together with their seat squabs and backs.

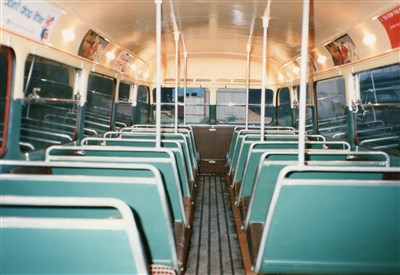
We were very pleased with the end result after all of our hard work and as a final job, we carried out some minor repairs to the battery crate which was in quite poor condition.
1989
We then embarked on a second full external repaint of the bus.
It looked quite smart again and we were now ready to attend a number of very important events.
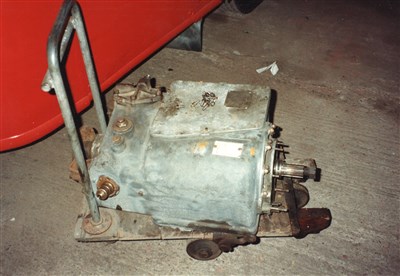
In the later part of the year, however, the gearbox jammed in fourth gear and the bus was unceremoniously taken back to base on a suspended tow.
It was immobile for a few months whilst we sourced a reconditioned gearbox, arranged for it to be delivered, then got it fitted into place and adjusted.
1990-1992
After the gearbox problem had been resolved, the fuel starvation issue re-occured and initially, we thought that we had a faulty pump. We had this repaired but the problems continued and we had to remove the tank once again. This time, we had it flushed out, cleaned and resealed by a radiator repair company in Tottenham so that we could be sure that it was completely clean.
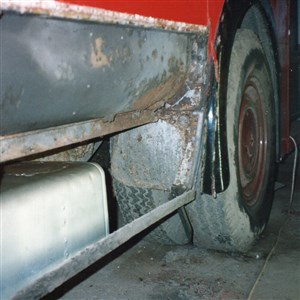
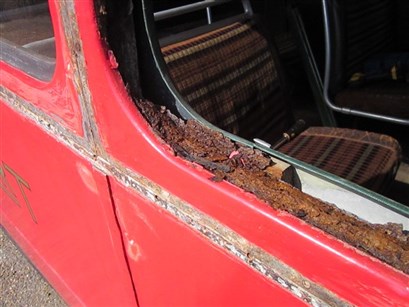
We emptied the lower saloon of seating in readiness for a similar refurbishment to the top deck and also started to dismantle some of the side panels to check the condition of the nearside rear wheel area. As predicted, there were many timber and metal parts that had rotted away completely and the repairs would end up taking longer than expected due to many factors but mostly lack of time.
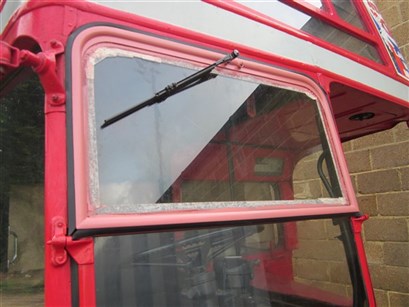
One task that we did press on and complete was at the front of the bus as during rainy weather, water would drip down into the cab. We decided that we should carry out some urgent work on the front blind box window assembly as the front windows above this area had already been replaced and no longer leaked. The complete frame with glass was removed together with all of the inner parts of the blind boxes.
These were dismantled, refurbished then rebuilt onto new plywood boards before being reassembled in the reverse order. We fitted new beading strips and then did a quick repaint of the glazed area and some of the other red bits nearby.
A further clean and repaint of the battery crate area was completed and a set of new batteries were fitted.
1993-1996
Between 1993 and 1994, we have no record of any repair activities and in the following two years, we only made 4 visits to the bus. There were a couple of reasons for this:
There were some problems with oil leaks from a number of places including the replacement gearbox and the vehicle would not see any road use at all until 1999.
1997-1998
We replaced one of the nearside inner floor coving panels and finally
finished the rebuilding of the shaped timber structure around the rear wheel arch
area.
One shaped steel bracket was completely rotted and beyond repair, so we
checked our stock of spare parts and were surprised to discover that we
had a brand new one in our cupboard. We were less pleased when we compared it more closely
and discovered that it was the offside one! We did manage to use it as a
template to make a mirror-image version which we then fitted to the bus.
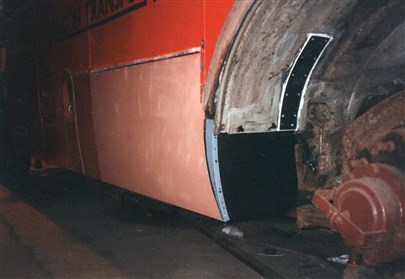
To complete the job, we fitted new plastic mudguards, curved beading hoops and a new rubber mud-flap before doing another partial repaint from the fuel tank inlet to the platform. We also replaced the nearside guard rail with a new piece of timber and fitted a new battery isolator when the original one isolated the battery permanently!
1999
A fail at the MOT test in April due to rear brake problems was not unexpected as this has been an ongoing problem for many years due to the small amount of mileage done in preservation and the build-up of rust on the brake drums etc. In the inspection pit at the London Borough of Enfield test centre, the tester also pointed out another cause of failure which was that there were beads of diesel dripping from the bottom of the fuel tank - something that we were expecting to see.
We drove to a nearby bus garage and enlisted the help of a friendly mechanic whose initial thoughts were to stem the flow by means of a blind rivet in the tiny hole. Unfortunately, one rivet led to another and each one was larger than the previous one. Eventually, it was such a big hole that there was nothing that we could do but stand and watch as most of the remaining fuel discharged into a large plastic drum in the pit below.
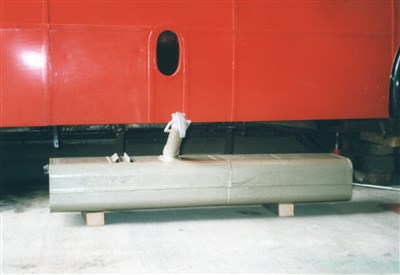
After much deliberation, we decided that even if we were to find a scrap tank from another RT, it would probably be in an equally poor condition. We also realised that when it had been cleaned and repaired 7 years previously, the state and potential thickness of the metal, particularly on the bottom, had not been checked at all. Our only choice was to limp the bus back to base by keeping the fuel header tank topped up with diesel by means of a pipe and a funnel from inside the lower saloon.
We left the tank at the garage for further investigation and soon afterwards they sent it to a company in Birmingham for assessment. They advised that it was too badly corroded to repair and instead, fabricated us a completely new tank with the original filler inlet welded on. The bill of £499.38 was paid in July and, after applying a few coats of Hammerite paint, we fitted the new tank into position. Later that day, we drove to the Tesco garage for diesel and the bus finally passed the MOT test again in August.
After passing the MOT, and as we were near to the old 'Forty Hill' terminus of Enfield bus routes 135 and 231, we decided to do a reconstruction based on a 1968 photograph from an old 'Enfield Preservation Society' magazine with the following result:
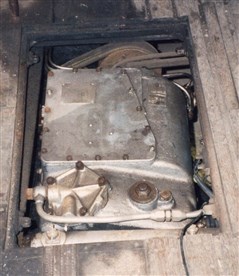
We noticed that the replacement gearbox was still leaking oil badly and was advised that this was due to the failure of the gearbox piston seal which would also need further attention or renewal.
2000
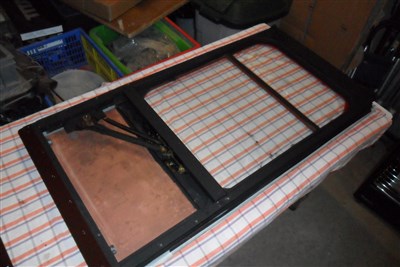
During this year, we started to remove some of the cream and green pieces from the nearside of the lower saloon followed soon after by the brown panels. A spare rear blind box window from one of our cupboards together with all of the dismantled pieces were taken away for repair and refurbishment. We rebuilt a complete opening window assembly that we had bought 1991 and had kept in a cupboard to use as a potential replacement for one of the two windows on the lower nearside.
In June, we took the bus to High Wycombe to have the rear brakes serviced. The mechanisms had jammed up on both sides so had to be completely stripped, refurbished and adjusted.
2001
We removed and replaced the existing rear blind box window and the lower nearside rear side window frame. After removing one of the side windows frame in readiness for the new frame, we discovered that the rebuilt one was too narrow - it was actually a lower saloon front window which is about 3" narrower than a side one!
In December, we managed to source and purchase a brand new window pan and place an order for three more to be delivered in 2002.
2002
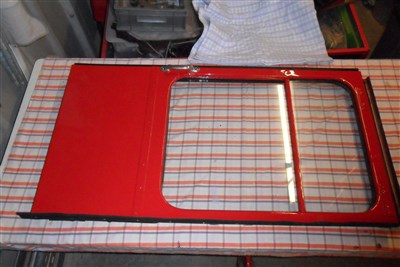
We refitted the new side window pan with some of our new rubber profile and also removed the glass to repair the small fixed window frame by the platform.
Once all the glass was back in position, the external beadings were fitted and the window areas were all repainted. A quick coat of paint was also applied to the wheels, the stairs and the platform edge.
2003
We removed two more nearside window frames and the panels below them so we could repair the structure underneath. One new opening window was fitted and one fixed window frame was repaired, then the panels were reinstated, followed by fitting of new external beadings and our patch repainting process.
2004
Our only recorded activity during this year was to remove some more of the rexine covered panels for refurbishment.
2005
This year however, we managed 18 visits and started on some repairs to the ceiling coving panels in the lower saloon where the school had made a cable entry point. We also removed part of red-line beading and undertook some repairs to the internal timber and metal framing on the nearside. All of the aluminium cover pieces that cover the gaps in the cream and green rexine were taken away to be cleaned and polished.
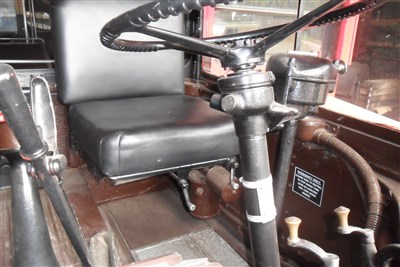
The next task was to remove driver's seat for refurbishment as the cab area had become rather shabby and neglected. We removed various parts from the cab area including a perished flexible gaiter around the floor edge and made repairs to the damaged areas. Metal plates were fitted to cover the holes where the school had fitted a tachograph unit and then the whole cab area was cleaned and repainted. A new cab floor gaiter and tension band were fitted and the drivers’ seat, re-trimmed with new black leather and new seat padding, was placed back into position. We also fitted a new headlight dipswitch on the left hand side switch console panel.
2006
We purchased some rolls of new cream and green rexine to start re-trimming more of the interior parts that we had removed in previous years. The green rexine pieces were re-fitted above the nearside bench seat frame and then the seat squabs were replaced.
Further concerns about reduced braking power lead us to get the front and rear brakes serviced yet again, this time with new pads from our cupboard stock and whilst it was away being repaired, a refurbished brake valve was fitted and the gearbox oil seal was finally replaced.
As our tyres had always been a mixed set in various states of wear, we decided to purchase 6 brand new ones at a cost of £940.00. The wording is all in Chinese but they are the correct size of 900x20.
2007-2008
We refitted some more of the green and cream rexined parts in 2007 and the following year had to replace a sliding window which had completely shattered.
2009-2010
In 2009 an oil leak on the differential was resolved and in 2010 the exhaust was repaired as part of it had come loose during a rally, causing the engine to run badly and with reduced power.
2011
The bus was away for steam cleaning and chassis silvering during June and the starter motor, which would not always engage properly, was checked at the same time.
When the bus was returned the fuel header tank, which had developed an obvious leak, was repaired in situ and a modification was made to the windscreen wiper.
We also purchased and fitted a pair of 12v 629 batteries as the old set of four 6v batteries were no longer holding a charge.
2012
We continued working on the interior replacing parts that we had refurbished and then re-trimmed or repainted. This included some more of the cream and green pieces and the aluminium bands and brown panels. We also attempted to straighten the section of red-line beading which had got badly contorted during removal. In hindsight, it had been a bad idea to remove this as we later decided that some of the cream panels which were held in by screws under the beading, could be re-trimmed without being removed after all! The beading strip was undercoated and refitted temporarily to avoid any further damage.
2013
First, we fitted a set of refurbished code plate holders on the nearside and then continued working on the interior.
New lino was applied to two of the nearside floor coving panels then the freshly painted seat brackets and brown metal cover strips were replaced. We removed the cab door so that a replacement slotted track could be fitted in place of the old rotted one.
As it was not possible to dismantle the old door to replace the mechanism for the sliding glass easily, a temporary spare door with
a perspex flap from an ex-training RT was located and fitted. The old door was taken away and completely stripped apart so that the
mechanism and sliding glass could be repaired and renewed.
2014
The cab door was rebuilt and repainted before being returned and refitted to the bus. It had obviously been fitted to a green bus at some time in it's life.
A new hardboard panel was fitted onto the left hand side below the front-facing window and then a new piece of lino was glued into place across the whole width of the front bulkhead, held in position by the repaired and repainted brown metal cover strips.
We also removed some damaged floor timber pieces that needed attention.
2015
We fitted a new varnished timber floor edge piece with drain holes and refitted the final green rexine covered pieces on the front bulkhead and corner.
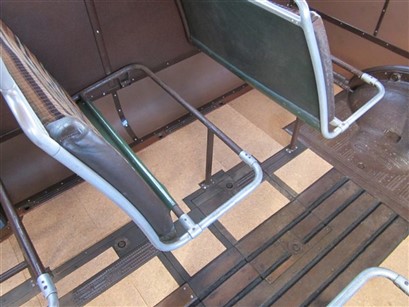
We replaced the polished front grab rails, advert panel, some metal floor strips and a few other wooden pieces and managed to refit a few seats on the nearside at long last. Some sanding, undercoat, then top coat were carried out to a small area of damaged paintwork on the upper deck ceiling using some very old paint that required much thinning and filtering before it was fit to use again.
In April, the bus went away to a workshop in Reigate for a full service and the fitting of a replacement operate pedal valve. This has solved an air leak that had been occurring for over 30 years and now allows the bus to retain its compressed air for much longer when stationary at an event!
2016
We had one final attempt at straightening the red-line beading which was then fitted back into place with slotted screws. We re-fixed a few other bits that were coming loose and gave the lower ceiling a good wash.
2017
We refurbished and then fitted a replacement lower front cab window as the original one was cracked and damaged in many places. As the new glass is so clean, it now looks as if the window is missing! We also removed some rexined pieces and one large panel inside the lower saloon on the offside ready to fit a new coving panel at floor level in one bay. All the exposed metalwork has been rust treated and painted in this area.
2019
In February, we managed to remove the coving panel just in front of the bench seat. This was more difficult as it had a curved end which ran underneath some of the other structure. After some rust treatment and a coat of Hammerite, a new shaped panel was fitted. We were then able to fit coving lino to both panels together with refurbished seat brackets and beadings. On the day before the RT80 event, we fitted two new brown rexined panels, some green covered pieces and all of the bright metal covers. We were able to re-instate all the lower saloon seating together with a new fire extinguisher for the cab and the batteries which had been removed for trickle charging at home.
During a 9 week stay near our home on the Isle of Wight, the following tasks were carried out amongst many other smaller jobs:
The 1st nearside window pan was replaced and fitted with new rubber for the glass.
A new piece of rubber edging was fitted to the upper front cab window.
The 1st nearside coving panel was removed and replaced together with repairs to the sub-structure and new lino on the inside.
A new guard rail was fitted to the offside of the bus.
The final brown rexine panels were refurbished and re-fitted together with cover strips and seat brackets.
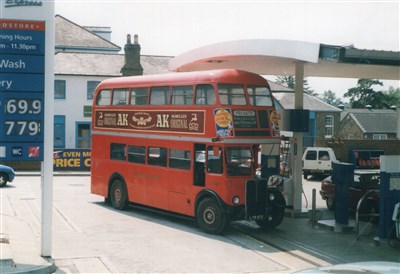
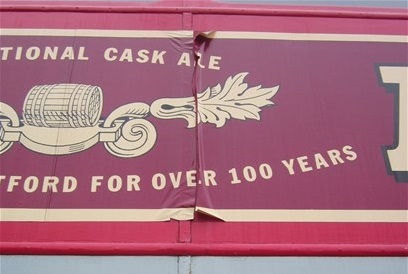
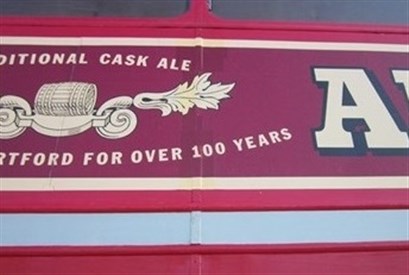
We made repairs to both large vinyl 'McMullens AK' adverts on the external sides.
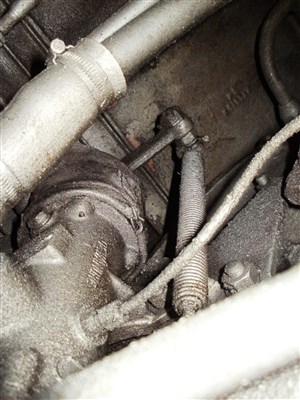
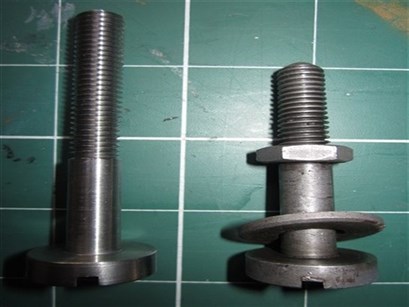
The flywheel cover was removed for grit-blasting and primer coat.
It was refitted together with one new fixing bolt which was made locally as the original was too short.
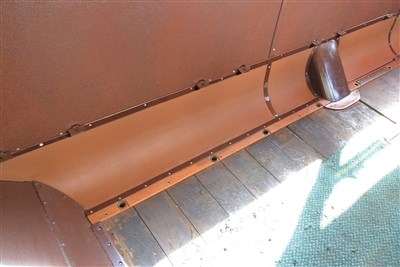
The flywheel cover, plus floor edgings, grip strips, the stairs and platform edges were all painted in chocolate brown.
A new curved moulding was made and fitted at the corner edge of the platform ceiling. The lower saloon has been repainted in the correct colour.
Ceiling coving adverts were fitted both downstairs and upstairs.
The lower saloon floor slats were cleaned and varnished, together with those on the platform.
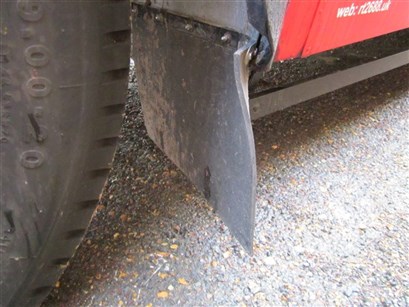
A new rubber mud-flap was cut and fitted to the nearside front.
The rear external bottom edge coving was straightened and re-fitted.
Both front wheel rings and both rear 'dustbin lids' were cleaned and repainted.
The bell cord was replaced, and brackets have been cleaned and polished.
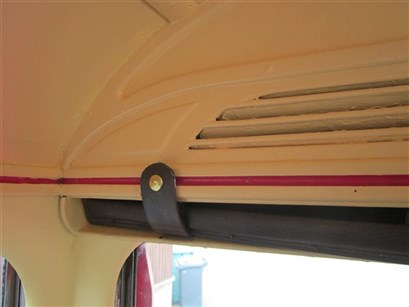
A new leather strap was fitted for the lower saloon front blind.
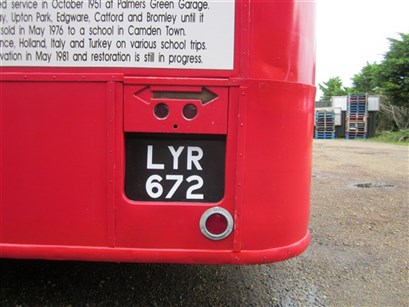
Both number-plates received new vinyl letters and numbers.
2020-2021
Due to restrictions imposed by the worldwide Covid epidemic, we made no maintenance visits to the bus during these years apart from one trip down to Reigate for servicing work.
2022
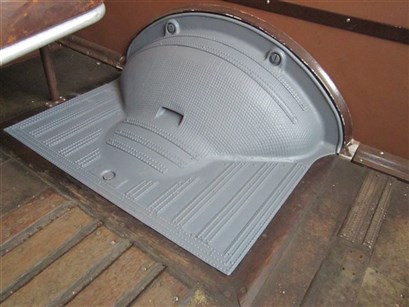
During another 5 week visit to the Isle of Wight starting in September we were able to replace the worn out, and in some cases missing, cork tiles on the lower saloon floor. They were then given a coat of varnish for protection. We also built a new removable rear door to replace the old one whose opening door part was over 50 years old.

All photographs are ©David Fisher or ©Malcolm Padbury unless otherwise stated.
Short Working back to the Home Page: